
Bradley's guide to making a table
What you need:
- Table saw
- 1 sheet of 9mm ply
- 1 sheet of 12mm ply
- 1 sheet of 18mm ply
- Rollers
- PVA glue
- 10 sash clamps
- 40/80/120/240 grit sanding paper
- Orbital sander
- Planer
- Skill saw
- Square straight edge
- Clear yacht varnish
- Paintbrushes
- 4 hairpin legs (bought)
- 20 screws
- Wooden drill bit
- Drill
- Copper spraypaint
What to do:
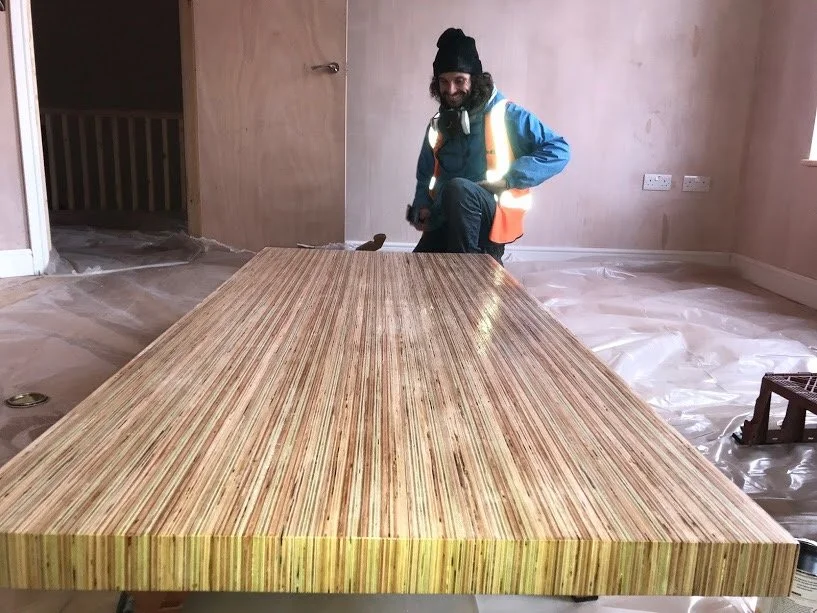
* Using the table saw, rip down the ply into 55mm rips.
* Decide a pattern you want to place the different thicknesses of ply in to
* Dry fit the pieces and make sure its the size you want your table
* Set up a tray of PVA glue and a roller
* Set up half of the clamps with equal spaces.
* Glue the inside side of the rips
* Place them in the clamps and push together, be quick before the glue drys
* In the spaces in between the clamps, place the remaining clamps on the top side of the wood.
* Leave the table in the clamps for approximately 12-24 hours.
* Take the table out the clamps and plane it until it is flat
* Sand the table with the orbital sander starting with 40 grit then 60 and then 80, always going with the grain.
* Brush off excess dust in between each grit
* Set up a straight edge across the end of the table.
* Using the skill saw cut a straight edge across the both ends
* Go over the table and the sharp points with a sanding block and the 240 grit.
* Brush off excess dust and your ready to varnish
* Take your table in a dust free room and apply 1st coat of clear yacht varnish.
* The dry time is 2-4 hours before reapplying another coat.
* De-nib with the 240 grit in between coats.
* Apply approx 4 coats, depending on how you want the finish
* Spray the hairpin legs with the copper spray paint in a well ventilated space.
* Measure the same distance from each corner and pilot drill holes for the fixings for the legs
* Once the legs are on. The table is done! (This applies if you've pre-bought legs which we did).